 |
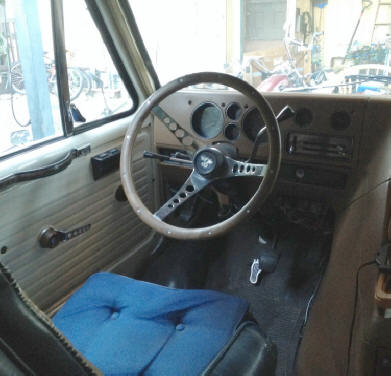 |
| The door as it is now, without the ratty
old door coverings, without all the duct tape, and with the new draft
window levers. I also changed out the original door handles and
lock topper with a set of vintage custom ones from the 80's that match the walnut trimmed steering wheel
I still had from the old 75 Chevy Van
that I owned in the 80's . You might also notice the absence of a window
crank. I upgraded both of the front doors with an after market power window kit.
So
now I can roll both windows down without having to reach across the
seats, or leave the vehicle. |
  |
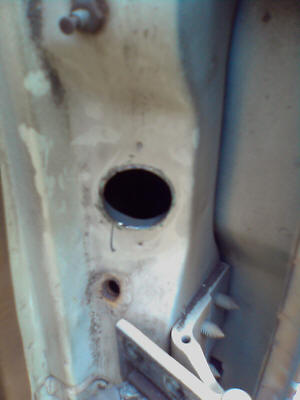
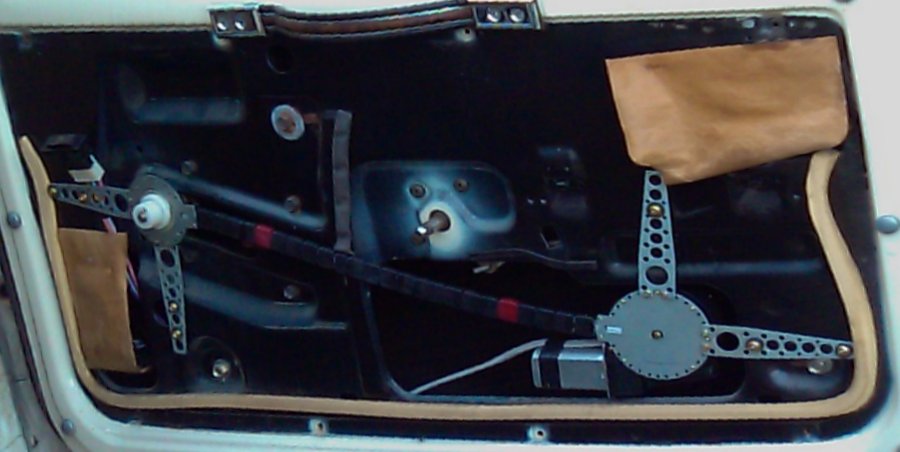
| To install the power window kit I first needed to
install rubber door boots for the wiring to go though. Again I went to
one of the auto wreckers in my area, and found a Chevy van that had a
set in good shape. I measured roughly where the holes were on that van
so I could locate the boots in roughly the same spot in my van. Next,
the doors had to come off.. Now I had to drill and grind out the holes.
Luckily, I discovered that hidden behind the outer sheet metal, was the
pass through for the boot I had removed from the other
van. So I just needed to grind the hole in the outer sheet metal until it
lined up with the inner hole. Now I could re-install the doors, install
the rubber boots and start feeding all the cables through to the inside
of the doors. I also re-routed speaker wires through the boot for
the new speakers that were going to be mounted in the doors. |
 |
|
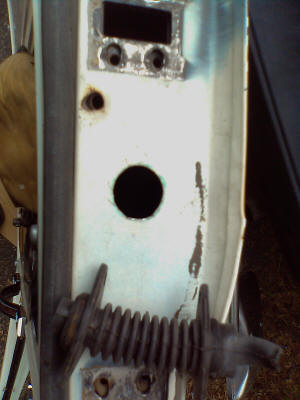
Here is a better shot of how I mounted the kit. I did not have to cut
anything away. The whole assembly fit right into the existing holes and
passages in the door, and the metal door panel screwed right back over
top of everything. The only holes I needed to create were pilot holes
for the mounting screws, and a small square hole in the inside door
panel for the switches to be mounted in. |
 |
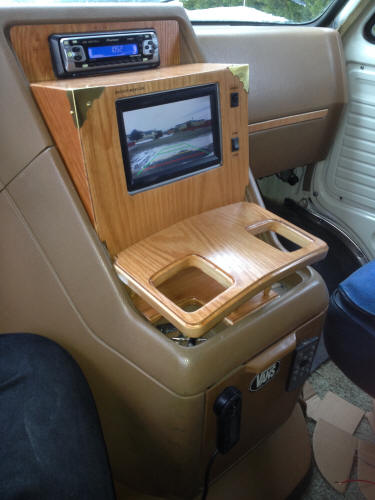 |
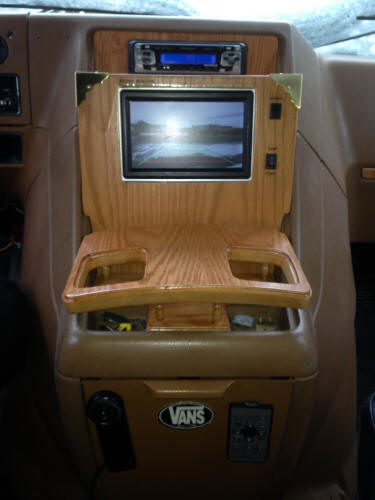
| Because of all the blind spots inherent with Motor
Homes, even ones this size, I decided to cover the damaged areas of the
doghouse with a large size backup camera. It might not be the prettiest
looking piece of equipment, but it is extremely functional, and actually
cost me very little to put together. I already had the scrap oak veneer
from the renovations in the back of the van, so the enclosure itself
essentially cost me nothing in materials. The same goes for the cup
holder. I made it from scrap wood as well. The video display is a 7 inch
secondary monitor from an old portable DVD player that no longer worked.
So again my cost for it was really nothing. The only thing that cost me
anything here was a backup camera (under 10 dollars from EBay), and a
couple switches. You might also notice an oak strip that I made and
attached to the indented area of the passenger side dashboard. Just
thought it would be a nice touch to tie in with the other oak details.
|